31 May 2017

Back to the eyes

Lenses again

In this post I am going to talk about lenses again. I know I did this before in an earlier blog post, but I think I should get back at that again. The reason is quite simple: last week a friend asked about lenses he would need. Now, I am a noob, but I do happen to have DSLR with three different lenses. And I have actually read a bunch of articles. He was not at that stage yet. So we spoke about what he wanted to do and then I told him what I would buy.
The funny part is: it is the exact same advice as I gave in that earlier post. During that talk however, we also came to a topic that is not mentioned in the previous post. But it is an important one, so I will talk about that part in this post.

F-stops

In case you think every guy loves the Formula 1 and this is about pit stops in the Formula 1, you're mistaken. We're still talking photography, and it's about a thing you can see on your lens.
Nikon lens 18-300mm
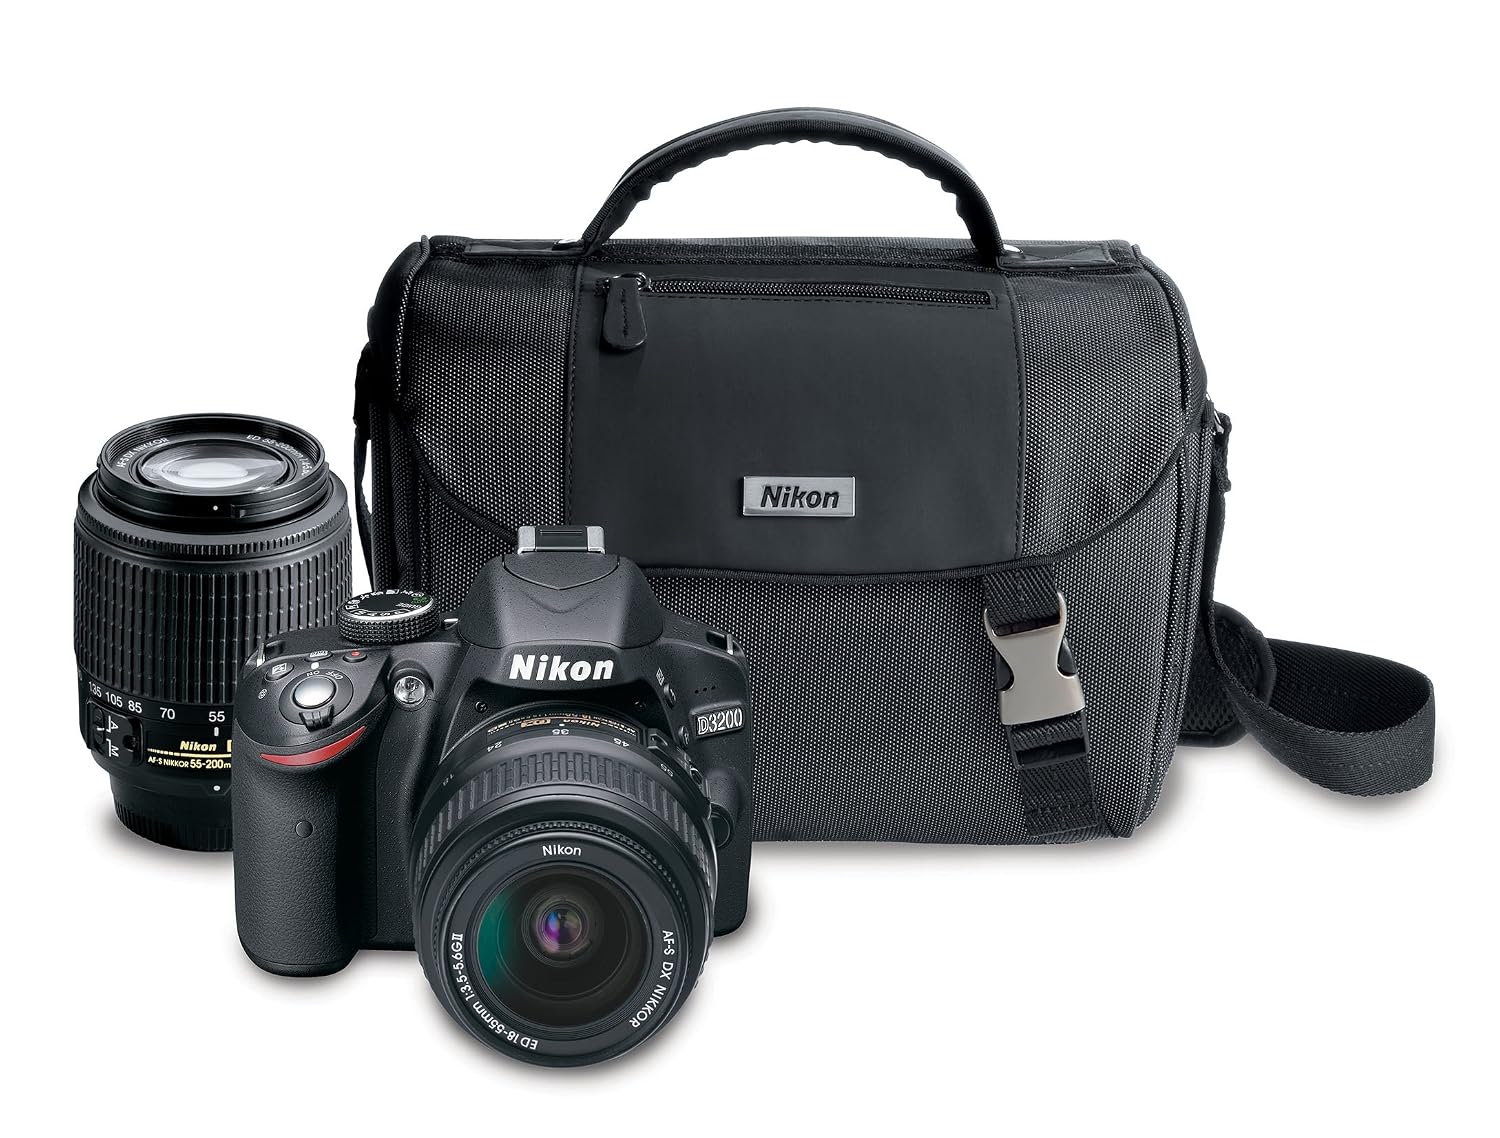
Nikon 18-300mm F3.5-5.6
In the image you can see the mention about the F-stop. Of course, they do not make it very clear, as the letter F is not mentioned there. But it is the part with 3.5-5.6 in it. There are also lenses with only one number there. Every prime lens, which has a fixed focal length, always has only one number. But a zoom lens can have either one number, or a range. The F-stop means your widest aperture. If you have a lens with one number, it has that widest aperture on every focal length (zoom level). If you have a range, the lowest number is the widest aperture when not zoomed in at all. The higher number is the widest aperture at full zoom. In general you can say that the lower the number, the better. And that means also more expensive. Just as lenses with a fixed aperture on all focal lengths are more expensive.
I can see that the question would then be: why would you want these lower numbers? What does this F-stop thing do?

Light and focus

And this heading here is the answer to the question in the previous paragraph. An F-stop can be seen as a number telling the wideness of aperture. A low number means a wide aperture. A wide aperture allows more light into the camera. And that means you can shoot in darker situations, or raise the shutter speed to freeze motion. Being able to do so, is of course nice. And that is why you should like a lens with the lowest possible F-stop value you want to pay for. However aperture has another effect, namely the Depth of Field (DoF).
Hello birdie!
Hello birdie!
The photo here demonstrates this effect. Now, I do not have lenses with really wide aperture like F1.4 or F2.8, but I suppose this example suffices. The photo shows the bird sharp. It's focused on it. You can see the branch it's sitting on is also quite sharp. The branches further away are... well... I guess we know they should be branches, but it's definitely not very sharp. In photography this is often a desirable effect. In this case I want you to look at the bird, not the branches in the back. If you want to show a landscape, it is often not what you want. A wide aperture gives a small depth of field, so with a wide aperture (so: low F-stop), we have a shallow depth of field and get blur sooner. With an F-stop of 1.4 and taking a close-up of a person, you might notice that when you focus on the tip of the nose, the eyes are already not sharp anymore.

Distance

That last remark brings us to the second ingredient that makes up the Depth of Field: distance. The closer the object is that you focus on, the shallower your DoF will be. So if the previously mentioned person would be not close by, but say 30 meter away, then with the F1.4 he would still be fully in focus. So, there are two things to consider, the F-stop and the distance to the object to focus on.
Wide aperture
Wide aperture
Small aperture
Small aperture
 And then we go to the last part about this, and that is the difference before and after the object in focus. It would be easy if we could focus on an object and then by setting aperture wider we would make the plane we focus on larger, both before and after the subject. Well, that is not how it works. The depth at the front is half of the depth behind the focus point.
The images here represent you: the photographer on the left. Your subject, the princess model in the middle and some background: a forest. The first image uses a wide aperture and makes sure your princess is in focus. The green around her shows what's in focus and what is not. And as you can see behind her is clearly more. Everything in the white area would be blurred.
The second image shows a much smaller aperture. And while the forest is getting into focus, the area right in front of you is still mostly out of focus. Rule of thumb is: 1/3 in front of the subject and 2/3 behind the subject is the focus area. With changing aperture, you can set the depth, but always in these proportions.The other way to set the depth would be walking closer or further from the subject.

What F-stop do you need?

So, you want those nice blurry backgrounds? Then you need an F1.4 lens, obviously. Or... no. You don't. The previous examples already showed you can get that also with higher F-stops (so, a narrow aperture). If you are close to your subject, you already make the DoF shallower. And a shallow DoF means your background gets blurry sooner. The other trick would be to move your subject further away from the background. And this is also demonstrated with removing parts in front of the subject.
bear
A bear looking at a snack?
I took this photo in the zoo, and I can assure they do not let you go near the bears. Nor do they allow the bears to go to you, it might mistake you for a snack, after all.
So, there are fences, like you can see in the background. Such a fence is also in front of the bear, yet you don't see it on the photo. This is also an effect of Depth of Field. The distance between me and the bear was quite some meters and with an F5.6 it has a reasonably small DoF. The distance between me and the fence was pretty small, so all it gave was a tiny blurry line. Which I mostly removed in post processing. So, do you really need that F1.4? I cannot decide that for you, but I would at least say: unless you want to go the path of a professional photographer - in which case you should not read this blog, but write it - you probably don't. Simply start playing with your aperture, look at the effects and don't forget to try out small apertures and wide apertures, both close by and at a distance. And then, after having seen what your current camera and lens can do, you can decide whether you need that. And in case you happen to have a spare one fitting my Nikon D3200: I would be a happy receiver, even if I think I do not need it, nor feel willing to pay the price for it.

Now, please go make great pictures with blurry backgrounds and perhaps we will next time talk about bokeh.


29 March 2017

The other kind of exposure

Attention seeking

As some of you might know, I have a few of my photos on ViewBug. I came across that site as I was looking for a place to put my photos online, after Google made their site badly working together with Lightroom, which I use for editing and as a catalog of my photos. Recently I was asked how I feel about ViewBug and that made me think about social media in general. Why are we actually uploading our photos to all kinds of media? The word popping up in my mind is exposure. And this time not the technical part of exposure using the exposure triangle. But the social exposure. And from there it becomes a blurred line. Do we show our photos to let others enjoy them? Or do we show them, so others can compliment us?

Fishing for other things than fish
The term attention whore seemed to become appropriate. This has a very negative and sexual connotation, but if take the definition from the Urban Dictionary, I think it could be suitable:
"Label given to any person who craves attention to such an extent that they will do anything to receive it. The type of attention (negative or positive) does not matter."

Because the more I think about it, the more I feel it's that we seek exposure, we seek attention. Preferably from like minded people or people that can give advice. But I think that getting "likes" or whatever they are called on that specific media would be good enough.
I mean, just look at some of the photos posted on social media. I am not going to say my photos are art (they most definitely are not), but compared to some of the things I have seen posted around, some of my photos look like masterpieces. Now, if these are just fun photos shared with friends or as a reminder/memory, that is of course to be expected. But some of these photos are actually posted on groups/communities about photography. And often enough many of these people do not respond to comments, or only to comments that say things like: "Great picture!" Comments which really make me look like a totally confused monkey wondering what's great about it. In case you are waiting for examples here, I have to disappoint you. It's not hard to find them, but it is rude to single one, or some, of them out and in a way mock them. So I will refrain from that and you'll have to go look for the examples yourself.

The fact remains though, that while I might see these photos as merely fishing for attention, I do basically the same. I post some of my photos on SmugMug and Flickr. A few on 500px. And I have some of them on ViewBug. Some of my photos on SmugMug are not visible to others, these are just my photos, kept there as a kind of back-up and a way for me to see them even if I am not at my computer. But many are publicly visible. As that is not needed to see them myself, I must conclude that I actually want others to look at them. And thus, I am fishing for attention, just like the lady on the photo above. Except that she looks much better while doing it. 😀

Good? Or bad?

Of course, there are some good things about this behavior. If nobody shared anything, we would not be able to see some of the very good shots that have been taken. And, if you never show your photos, nobody can point out to you how you might make better ones. And by showing photos, we can also share interests and get to talk about those interests. And that's awesome, right?
However, I feel there are also negative parts about it. The first and foremost is that you might actually forget what this was about. I'll explain. Given my age (50 in three weeks time) I consider myself at a point that I will not feel devastated if I do not get many likes. Just as I can survive writing a blog that has only a few readers. If you're curious, I would say that there are about 10 - 15 people reading the blog. Not that much, if you consider the blogs having thousands and thousands of followers. But at my age, you can see that in another perspective. There are a dozen people out there that take some of their precious time, to read my ramblings. Which I do consider not bad at all. In fact, it makes me happy. But anyway, even having the advantage of not needing those amounts of likes, I do recall that
I had a point where I was wondering: How do I get more people to watch my stuff and like it? Without realizing it at that moment, I had crossed a line. I was no longer concerned with my reason to make photos, I was concerned with what other people would think and how I could get more attention. Yup, at that point I was most definitely an attention whore.
Luckily for me, that didn't take too long. I never got to the point where I was thinking hard about how to get more attention. As I almost immediately realized what that thought was, and that it would mean I would be losing my hobby. You see: I make photos for myself. It gives me a reason to take my time at places like a museum or a zoo. And then, I get to spend my time editing them. Showing a few of them online, without much care whether they are thought of as great by others. It's my hobby, I like spending my time that way and as such it gives me happiness.
Going hunting for likes would be the same as becoming a professional. In the latter case you work directly for people who tell you what they want, and they give you money. But if you hunt for likes, you're indirectly working for others, to give them the photos they like. You, are merely a tool at that point. That does not mean I say to avoid exposing your photos. In fact, to share them with like minded people is great. If you can exchange your thoughts about your photos with others, that is very great. But if you are there waiting for random people to press a button called 'like' or '+1' or 'fav', you are wasting your time. Not getting them will make you unhappy. And getting some, will only bring out the urge to get more.
So my conclusion would be: social media are neither good nor bad. They offer possibilities. Use them as you like, and if well used they can bring lots of pleasure. But beware of the trap there and just keep your mind on what you actually want. If making photos is your passion: be out there and make photos. Share your interesting ones to let others enjoy, but don't wait for their "approval". Discuss your photos. Discuss the photos of others, every honest comment is much appreciated by most photographers. But keep your focus on your photos, do not let the social media dictate what you should do.

Viewbug

Now, as this all started with ViewBug, I think it should also end with ViewBug. I answered the question with telling that in my humble opinion ViewBug is mostly about contests. And that I do not expect to ever get a real high ranking in one of them, let alone win one. That perhaps one day I might feel disappointed for never making that. And perhaps stop participating. But I would have to wait and see until that time.
Still, I have some photos there, and I have entered some contests. I so far have a photo that is in the top 50%. This might not seem much, but given that all members of ViewBug can vote, it actually means that my photo at that point is generally considered better than half of all photos in that contest. It states: we, the voters and frequenters of this site consider your photo to be in the top half. It is really not a bad position.
Even if you would be the last - which is quite an achievement by itself, as there can only be one - it does not make the photo bad. That is the problem with contests: for every winner, there is a loser. Except, in this case you don't really lose anything. All it tells you is that the people voting liked other photos more.
Now, to help you a bit on that site: people can 'like' photos. I regularly check the new ones and 'like' the photos that catch my eye. it gives me some time to enjoy watching pretty photos. And I hope someone else will be having a little smile when that 'like' pops up. There is also the 'Peer Award'. I give that when I think a photo has something special. Of course, what that special exactly is, I don't know. Those are the ones I think are standing above the crowd.

If you feel like entering contests, hop over to ViewBug and give it a try. it doesn't need to cost you money. With a free account you can participate in about 25 contests and have one submission in each of them. I am not going to say it will be easy to win, but you can only win when you participate.
If you look for people enthusiastic about photography, I would say: find an online community. Not a place to dump photos, but look around for a place where you might get a comment that goes beyond: "Nice", or "Cool". Or simply look for a local photography club. :)

Anyway, I did share a bit of my view on social media and photography. And I would really love to hear your views on this. As mine are the views of an old guy. More modern people might see this totally different and I would like to hear those views too.

22 March 2017

White on scales

White evenly distributed

Funny that we have this thing called white balance, as it in most cases is not necessarily about white. So, what is white balance exactly then? It is more the balance of colors and one would change it, to make a photo look more natural. Now, you might ask: if I see it a certain way, then the camera will take the photo also like that, right? By now, everybody who has read a few of my previous posts knows I will answer that with a no. And it is indeed no. Basically all lights are not pure white. They have a different temperature. And temperature is indeed the term here as it is expressed in Kelvin. An object would be called white, if it reflects all wavelengths. And black, if absorbs everything and reflects nothing at all. However, white light is not always reflecting all wavelengths with the same strength. And here is where that temperature comes in.
Couple on a bench
If you have a low temperature, say 1500 Kelvin, as from a candle, it will be more intense with the higher wavelengths, like red and orange. A high temperature 9000 Kelvin, as one would have from a heavy overcast sky, would be more intense with the magenta and blue wavelengths. Funnily enough, we call the high temperature cool and the low temperature are the warm colors.
The difference between us and a camera, is that we, or our brain to be more specific, partly compensates for this difference. And as such we will perceive people with a normal skin color during sunset, which has light with a temperature of around 3000 Kelvin, but also when standing in the office, where the fluorescent lamps will have a temperature of 5000 Kelvin. That's pretty cool from our brain, right? And for the people thinking I would once again say no: you're wrong. This is pretty cool.
The camera has no brain and does not compensate. Therefore a photo from one person in the sunset and one in the office will give different skin colors. And here comes the part about white balance. By setting the white balance on the camera, you tell your camera to compensate for the different light sources.

Changing this delicate balance

Now we know that different light conditions will show our photos with different tones. How important is that? If you look at the photo in the previous paragraph, you'll probably get a complete different feeling than from the photo below.
Original white balance
It is the obviously the same photo. But the first one is much warmer. I admit this is not just the white balance, though. But it has a part in it. The photo in this paragraph is the one with a white balance as shot by the camera. You can argue which one has the more natural colors and I suppose most people will point at this second one. Even if it is a little too cool (or in other words has a small too blue tint), The one at the top has too much orange. As it should be, as I - besides changing the white balance - overlaid the photo with an orange tint.
You are by now probably frowning and wondering why I gave that example then? Well, two reasons. The first is a form of vanity. I edited this way, because I like it that way. And therefore I also like to show it that way. The second is that it, just by its exaggerated warmth, shows the effects white balance can have. The top one approaches the effect one could have from a nice orange sunset. It also shows that one might change the white balance to get a bit away from the original colors.

Setting white balance


White balance corrected
If one would be shooting RAW, one would not care much about it. The camera will keep all color information and then you can adjust it in your post processing software. After all, when shooting RAW, post processing is not really an option, but a must. If you have a camera that cannot shoot RAW, or you do not want to shoot RAW, you need to set the correct value, if possible. If you have it on auto, or no option at all, the camera will examine your photo and using its programmed algorithms to set the white balance. If I recall correctly, for my Nikon it would like to see around 18% of neutral colors. A neutral color is a color which has the same amount of red, green and blue in it. Making it a perfect gray. That is surely not always what you want, but I have to say that quite often this turns out reasonably well.
What to do if you cannot set your white balance in your camera? Can't you edit it if you do not shoot RAW? Sure you can. The reason why it is said that you can easily change white balance in a RAW, but not a JPG is simply: on the JPG, the camera has already applied a white balance correction. Then it saves in JPG, loosing the original sensor data. The resulting file has less information and has less "bandwidth" of altering the white balance, before it starts to look wrong. As we also do not know what the camera applied as white balance correction, we cannot go back to the real state. With RAW, you get that real state and the original sensor data. But you can most certainly still change the white balance of a JPG photo.
The photo in this paragraph actually is the same photo again, but this has a modified white balance to resemble a photo taken during the day. You can clearly see it is warmer than the previous one. The green leaves have lost their blue-ish tint and seem to have a bit more yellow in them. I personally liked this one more than the previous one. But I felt this was still not warm enough and altered it to look like the top one.

Which one would you prefer?


08 March 2017

Decorating corners

Grab the adornments

Statue staring into nothingess
Of course, I should have continued with a new post about lenses, as we were not finished with that. But instead I decided to talk about decorations. In this case about "decorative design". So, grab the garlands and the balloons and start decorating your camera, to get the better photos!
If you're not in a festive mood, you can also read on and hear more about these "decorative designs". I actually checked the word I wanted to talk about, and found the origin of it on thesaurus.com:
vignette 1751, "decorative design,"originally a design in the form of vinetendrils around the borders of a book page, especially a picture page, from Fr.vignette, from O.Fr., dim. of vigne"vineyard" (see vine). Sense transferred from the border to the picture itself, then(1853) to a type of small photographic portrait with blurred edges very popular mid-19c. Meaning "literary sketch" is first recorded 1880, probably from the photographic sense.

In the sense of photography however, vignette has nothing to do with vines. In photography we talk about vignetting when the corners are darker. And there could also be a small distortion in the corners. There are multiple types of vignetting:
  1. Artificial vignetting
  2. Optical vignetting (also called natural vignetting)
  3. Pixel vignetting
  4. Mechanical vignetting
In general you do not want vignetting, and lens manufacturers do their best to keep this to a minimum. Just as camera manufacturers can build in software to reduce vignetting. This software works well for JPG, but has no influence on RAW. Well, I found that comment online. It said it would work with the manufacturers specific software, like Capture NX 2 for Nikon. But less specific tools like Aperture or Lightroom don't use that information.
Statue with vignette
Statue now staring at the void
How do you recognize a vignette? Easy, just look at the first photo with that statue staring into nothingness. Let's take that as the example without vignette.
Now compare that to the same photo which has one, where the statue is now staring into the void. Of course, I did cheat and did put this exaggerated vignette on it. However, it should serve its purpose to see a vignetted photo. If a modern camera or lens would create a vignette like this, it would be time to return it to the manufacturer.

Away with that black

So, do we always want to remove vignetting? Apparently not, as the first type of vignetting is aptly named "artificial vignetting". And that means that the photographer did put it there on purpose. Just like I did with the example. There will probably always be discussions whether this is "good" or "bad", but I think that is simply for the photographer to decide. That means you! From me you will not receive many nasty comments about an applied vignette. In fact, I am in the group of people that actually like vignetting. Not as much as done in this example, but the original also has a little vignetting applied. So why would you do that?
For me: I tend to like slightly darker photos. When post processing I am almost always turning down the highlights and whites. And a subtle vignette does darken the feeling of a photo. How do I know I like darker images? Well, obviously, because of the histogram.
Histogram
Histogram, exposed to the left
Many of my photos turn out to have a histogram like the one shown. On the left are the dark colors, on the right the bright colors. And as you can see, there is a lot of dark in the photo I used for this. (The histogram is not from the photo with the statue.)
When you have a lot of your photos with such histograms, you probably like darker photos. Just like me.
After this small detour about histograms, back to the vignetting. I said it darkens the feel of a photo. Naturally it does more than darken the feeling, it actually darkens the corners after all. There is also another aspect to that, though. Look again at the two photos. Do you notice how the vignette forces your view towards the center? This vignetting works fine with the subject in the center. If the more important parts of your photo are near the edges, well congratulations, a vignette like this has just ruined your shot.
Anyway, keep in mind that vignetting is often considered bad. And if your camera or lens produces heavy vignettes, it probably is bad. But vignetting is sometimes done on purpose.

Why do I get this black?

This part goes about optical vignetting. And this is also the one that the manufacturers are trying to reduce as much as possible. For you, as photographer, there is not much to do about it. The cause is how the light enters the lens. When the light comes from an extreme angle, it travels a longer distance through the lens towards the sensor. Longer travel means more "falloff", or said for a noob like me: less bright light reaches the sensor.
Also, the light entering at these extreme angles is partially blocked by the lens barrel. You can see at your camera that the lens is not totally at the front. Luckily as it otherwise might just drop off. There is usually a small part of the barrel sticking out and that partially blocks the light coming from the extreme sides.
 Lenses with a long focal length are less susceptible to this effect than the ultra-wide angle lenses. You could also see if stepping down the aperture (higher F-stop) helps.
The way the light travels through the lens, is also the cause for the distortion, turning f.e. round bokeh into the shape of a cat's eye pupil.

What is pixel vignetting?

Pixel vignetting is a bit like optical vignetting, but instead of having to do with your lens or how far the light travels, it is about how it hits the sensor. The sensor is the retina of the camera. In the human eye, the light comes through your pupil then goes through the lens, so we can focus on something. The light then falls on the retina, where the cones (colors) and rods (light intensity) translate the image to electrical signals to our brain. The sensor in the camera captures the light that falls on it and then translates that to a digital photo, with for each channel (red, green, blue) an intensity value.
If you find a volunteer to examine his or her eye, please do refrain from that. In most countries it is not allowed to poke people in the eyes and starting to examine it. Not even when you get permission. It also tends to lead to permanent damage, called blindness.
Anyway, the sensor in the camera is flat and all the pixels on the sensor are facing the same direction. probably perfect for light that falls straight on it/ Which would mostly be the case for pixels in the center of the sensor. When light comes from an angle, slightly less light falls on the pixel and that also introduces a little vignette.

Let's get to the mechanics

Last we have mechanical vignetting. And I kept this last, as it's also the easiest to understand. it means that something is blocking the light. Like a lens hood. Manufacturers do think about the shape of their lens hoods and using another one could lead to more mechanical vignetting, as it blocks more light.
But also the stacking of filters, teleconverters, extension tubes or other accessories that diminishes light in the corners are called mechanical vignetting.

I have white corners

Statue dreaming away
This vignette has no black corners, but white. And that means all the explanations about light traveling, angles and whatever are not suitable. In fact, the only suitable answer left is the artificial vignette.
And indeed, instead of a black vignette, most post-processing software also allows you to make a white vignette. While a black vignette darkens a photo, a white vignette lightens it. It only actually lightens the corners, but as an effect the whole photo feels more lightened.
I personally find that, although it does turn the attention more towards the center, it lacks the strength that a black vignette has. Yet, this type of vignette has a usage where photos are supposed to be more "dreamy". To me it feels softer than a black vignette.
In general a white vignette works well with an already bright photo, or to camouflage a bright sun flare on one side of the photo, by brightening up all sides. A black vignette adds more drama or mood.

Now, when you want to add vignettes, do remember that the effect can be used subtly. Not every photo needs or becomes better by using the maximum vignette that your software allows. Of course, the strength of vignetting and the choice of using it at all, is totally yours. I personally like them and most of my photos have a black vignette. Also keep in mind that in post-processing a vignette does not always need to be centered.

So, what is your opinion about the usage of vignettes? Do you use them? Do you like them? If you had to use one, would you pick the black or white vignette on the statue? Or would you prefer that all vignettes photos should be burned?

01 March 2017

Wearing glasses

Nearsighted? Farsighted?

While a camera is neither nearsighted nor farsighted, it will most surely need to wear glasses. Or more correctly said: lenses. Not the small contact lens we humans place on our eyes, though. These are the more heavier lenses. And without a lens your camera is not nearsighted or farsighted, but blind. So let's talk about the glasses your camera might need.
lens on iPhone
Lens on  an iPhone
First of all, this is about a camera with interchangeable lenses. If you have one of those nifty cell phones, or a small compact camera, I fear you're (almost) out of luck. As you can see on the picture you could get lenses for your cell phone. In this case a cute, adorable, pink iPhone 6S. I can't really judge the quality, but given the price, the way it's attached - like some paper clip - I seriously doubt this will get you professional looking photos. Of course, if you happen to have one of these, and have great photos, please share them. One of my Google+ groups even has a special section for "Phone Photo Friday" and we can surely use more members there.
We're also not going to talk about the two million dollar lens I mentioned in the previous post. I am aware that you will need that one soon, but just keep saving money for the coming weeks, or you won't be able to buy it.

The bigger, the better

big sigma lens
Working out!
Many guys seem to believe this, many girls seem to say it's not true. They are usually talking about something else than a lens. I am a small guy, so I hope the girls are correct on that topic. On the topic of lenses, I can assure you: the girls are correct. Not saying the guys have it totally wrong, but before you think of size, you need to think of type of lens. And not just whether you want to be walking with a mobile heat seeking missile launcher, like the man on the picture, But more about what you want to shoot. Shoot photos, I mean, not shoot missiles. Obviously.
If your answer is: I want to shoot it all, then I suggest you buy a lot of lenses. Because we have different types of lenses. Often this has to do with how far they zoom in, but there are pretty special ones, like the fisheye lens. And then there is the thing with stabilization or not.
Let's start with that one, as it's at least reduced to just two options: your lens has it, or it does not. Doesn't come much easier than that, does it?

Stabilization

If you're coming close to become an old man like me (well, perhaps not that old yet, but still), than you might notice it becomes harder to keep things in your hands without moving. Now, to take these awesome sharp photos, you do not want your hands to shake. You can help that a lot by using a good stance when using your camera. One of the reasons I like an optical viewfinder, as it's more stable. And people will tell you to keep your arms close to your body and so. Still, keeping perfectly still is hard to do.
Luckily, we live in an age with lots of technology and here comes technology to the rescue. Just like your friendly local fire brigade. The lens makes a bit less noise than the fire brigade, and I admit is also much less important, but it still come to the rescue of the shaky hands. The lens with stabilization will correct for the small movements you make while holding your camera. So if you are like me: make sure to get that stabilization. Of course, different vendors will use different names for it, as vendors are not here to make life miserable for their competitors only. They also are here to make our lives miserable by making things harder. Oh, and they are also here to take our money.
If you take a Nikon lens, it is called VR (Vibration Reduction) and they now even have VR II. Should you buy a Canon lens, it will be called IS (Image Stabilization). And our friends from Sigma call it OS (Optical Stabilization), while Tamron names it VC (Vibration Compensation) and Sony goes for SS (Steady Shot). In case you wonder: yes, they all do the same, they all come to the rescue of the shaky hands.
Always buy that? Perhaps not. Lenses with stabilization are more expensive than lenses without. Also, if you mostly shoot with short lenses, during day time, you can have a quite high shutter speed, so might not need it anyway. In general, being more expensive seems to be the only drawback.

Perhaps not bigger, but the longer, the better!

Longer what? Oh, you mean the focal length of the lens. I see, yeah, well, still not always true. What is actually this thing focal length? From Wikipedia: "The focal length of an optical system is a measure of how strongly the system converges or diverges light. For an optical system in air, it is the distance over which initially collimated (parallel) rays are brought to a focus. A system with a shorter focal length has greater optical power than one with a long focal length; that is, it bends the rays more sharply, bringing them to a focus in a shorter distance."

Pirate holding spyglass
Captain Jack Sparrow with his spyglass
If you understood that: great. To me that is a bit of techno mumbo jumbo. I mean: collimated rays? Is this Star Trek? Talking about Star Trek, did I mention that I liked the first series more than the ones after that? Wait, what? You want me to skip on Star trek and go back to photography? Okay, okay.
Focal length for noobs means magnification. The focal length is measured in millimeters and the higher number magnifies more than the lower number.
So take your cell phone with a focal length of 2 mm and then take my Sigma lens with a focal length of 600 mm. So obviously, my lens magnifies 300 times more than yours. Clear? Nope, not clear. Magnification also has to do with the size of the sensor. The size of the sensor on a typical cell phone is smaller than the sensor on a DSLR. So, the same magnification on a cell phone needs less focal length than on a DSLR. Just as any lens on my D3200 with APS-C sensor magnifies 1.5 times as much as it would do on a 35mm full camera, as a 35mm sensor is 1.5 times larger than my APS-C sensor. Larger sensors get less magnification, but have more detail.
Does it get confusing already? It might. But at that point it might also be an idea to just keep the simple thought: a longer focal length on a lens for your camera, means more magnification. So, if you look at our friendly pirate captain in the picture: he has a long focal length, so he will get a nice magnification. Whether he looks straight can be questioned, but whatever he sees, he sees it BIG!
With the stuff above in mind, what focal length do you need to buy? That depends on what you want to have in your photos. If you stand next to your subject, you do not want the lens with the longest focal length. If you do landscapes, you do not need that either. If you want close-ups of wildlife, where it's hard to come close: you will probably like longer focal length. Just as with sports. There is no clear answer and you will simply have to try and decide.
What would I buy with my current knowledge? I started with two lenses, an 18-55 mm and a 55-300 mm. They both came with the camera. Al the start, I found myself almost always taking photos with the 55-300 mm lens. Lately I noticed that I don't always need the close-up. I can walk closer, or I like more context around and I am regularly out with the 18-55 mm. So, I find having them both very fine and would find it hard to pick one of them. In case I had no lens and need to buy one at the moment: both Canon and Nikon have an 18-200 mm, Sigma has an 18-300 mm and Tamron a 16-300 mm lens. If I had to buy just one lens, I would look at such a beast as it allows you to do a lot.

Prime or zoom?

In case you start thinking of math, when you read the word prime: sorry, this has nothing to do with prime numbers. If you thought I, being Dutch and having poor English skills, wrote it wrong and meant primary: no, this is not your favorite lens that you call your primary one. Prime in this case is the "opposite" of a zoom lens. The difference? A zoom lens zooms and a prime lens does not. That's why one is called a zoom lens. So, now Captain Obvious has stated the obvious, let's elaborate.
As said, a zoom lens zooms. So you get these ranges, like 18-55 mm. That's when you see those photographer turn a ring on their lens and it becomes longer. With guys you don't need to turn things, just turning them on makes their stuff go longer. They have zoom thingies. When they do that, they are zooming in (or out) and thus magnifying what they catch in the lens.
A prime lens does not have that ability. If you see a photographer turn the ring on a lens and it is not going longer or shorter, then he is using manual focus, so yes. You can still turn things if you want, even on a prime lens. This may seem like a huge disadvantage, so why would you want a prime lens?
The first answer might be: money. A prime lens is cheaper and weighs less. They also tend to give a better image quality. And, due to the more simple design often have a wider aperture than a zoom lens. Again, it's hard to say which one you need. Many guides say you learn better by using a prime lens and that might very well be true. However, I would say a beginner is better off with a zoom lens, as it offers more flexibility.

Finally done?

No, not really. There is still more to tell about lenses. I mean, we did not even talk about macro lenses, right? And only mentioned the fisheye. But before you tire too much from all this reading, I'll stop bugging you for now.
Happy shooting!

28 February 2017

What gear to shift in

Disclaimer

This is actually a topic I wanted to avoid, however one of the readers asked for it. If you have very few readers, you cannot ignore that, can you? I would say even if you have millions of readers you cannot ignore them, but it might be much harder to satisfy them all.
Okay, I do think I should actually start with a disclaimer here. Specifically to point out that the stuff below is an opinion. Although I believe there is no error in the text, I am aware that a starting photographer has not seen all there is to be seen about gear. Not that a lack of knowledge keeps me from having an opinion, but really, use your sense when going out to buy. Don't just follow one opinion. I really would be unhappy if I am told later that I "advised" something that you would not feel comfortable with at all.

Nikon D3200 kit
Now, my very, very short answer is:
Buy the entry-level Nikon or Canon DSLR. Not their latest model, but the model before that. For a beginning photographer, these are powerful enough, yet affordable. And by buying the model before the latest, you also save a bit of money. If possible: buy a kit (body and lens).
I ended up with a kit like this. Mine has a 55-300 mm lens and VR (Vibrance Reduction) though.

Needed equipment

Buying a camera is more personal than you would think. Sure, it's just a thing, but if you do well, it will be with you for years. Like your spouse. Or, if you really go too far with your hobby, even more than your spouse! I would suggest that you pay more attention to your spouse than your camera, though. Even if only that the camera will not divorce you. The spouse might.
Now, I bought my camera a little over a year ago and went to the shop having no clue what I needed, or even what I actually wanted. Even if I think I ended up with a camera that suits me, it was surely not the smartest thing to do. Not even for a noob. So, I'll write about a few of the things that I picked up in the mean time, to hopefully help someone else make a better informed choice.
First though: what is needed for starting photography? Easy: anything that can make a photo is enough. A cheap camera can make photos, your cell phone can make photos. Most of this will be an opinion, and even a beginners opinion, the two lines before this one are a fact!
So, back to the opinion part, where I would say: before buying an expensive camera, you might want to start shooting photos with a cheap camera or a cell phone. Then see if you actually like taking photos and if you think about making "better" photos. If you just think about making more photos, don't buy the expensive camera yet.

The type of camera

I ended up with a Digital Single Lens Reflex (DSLR) camera, but you might as well get one of those mirrorless system camera's. The latter are a bit smaller and weigh less, while still having the capacity to switch lenses. As far as I read, the quality of both types are around equal. The system camera is currently most likely a bit more expensive, compared to a DSLR of equal quality.
Another difference is how you as photographer will look at what you will shoot. With a DSLR, a mirror will send the light coming in from the lens towards the optical viewfinder. That means that you are actually looking through the lens and see for yourself. Most also have the LCD screen on the back. That is not the light falling on the lens redirected to your eye, but the light falling on the sensor and from that the image is composed. That should be what the camera will "see" when taking the photo.
A mirrorless camera obviously has no mirror to send the light towards your eye. So it does the same as a DSLR does, it takes the image from the sensor and projects it on the LCD screen. To be more complete, there are also camera's that have an Electronic ViewFinder (EVF). This looks like the optical one of the DSLR, but the image is projected there.

I think here are interesting choices to be made. A camera with a viewfinder is basically held in front of your eye and a bit stabilized by your head. Also, your arms are close to your body, giving much less chance on motion blur. If you want real sharp while hand held, I would definitely go for camera's with a viewfinder and not only an LCD screen. If you mostly shoot on tripod, then this would not matter.
An EVF can show extra information, like a histogram when it shows you the image. Or any other overlay the manufacturer might think of. So far, I saw no use of that, but a pro could most likely point something out.
A camera with EVF instead of Optical ViewFinder (OVF) can be problematic when you need certain timing. The EVF's are getting better, but they may still lag a bit as they show the image. So when you need to press the shutter on exact times, you might miss the moment. Now, if you're a landscape photographer you would not care, as I never saw mountains run away. Nor an ocean or a tree. But should you want to take photos of running mountains, use an OVF. 😀
Also be aware that an OVF uses no battery power. You simply look and that's it. Of course, do not forget to remove your lens cap, or you won't see much. An EVF, like an LCD does use battery power and you might need to bring (more) spare batteries, or take less photos.
As I bought my camera, I had no clue about all this, so did not even bother to talk about such things with the vendor.
My personal choice would definitely be a ViewFinder, I would surely not go for the LCD only option. For system cameras. the EVF might be included (usually higher end models), or an extra option. I do not think there is a DSLR without an OVF.
If the choice would be between optical or electronic, the choice would be less clear cut. But in the end, I would prefer not using much battery power and I like to be able to simply look and see what is there to see. I should add that I have not that great eye sight, so sometimes just looking and zooming in can also help me notice things I did not see before. And I am too lazy to wear my glasses.

Glass! And more glass.

The more important part should be the lenses. Good lenses are expensive, so you surely would want to be able to use them on a better camera, should you decide later to upgrade. That means, unless you decide for a high end camera, you need to not only look at the entry level one, but also whether the lenses fit on other more high end cameras. If you take a camera from the big brands, that will not be a big issue, but you might be stuck on the brand. Or you might later want to sell your lenses. Given the costs, there is a market for sued lenses (and cameras, or as they are called: bodies).
More expensive camera's will probably yield higher quality photos. But the most can be gained by getting better lenses. Lenses that allow a lot of light through, that have little distortion and... well, tend to cost more money.
Leica APO-Telyt 1600mm f/5.6
And I am not talking about this 2 million dollar lens here. In case you think you read it wrong. Nope, this baby is according to this article two million US dollars. But lenses costing thousands of euro's (I am European, so yeah, I always think euro's) are not exceptional. And should you buy something expensive it would be nice to be able to use that on your next camera.
As another indication of lens prices: I just looked at the lenses in stock in the webshop of the shop I bought my camera. Then I sorted by price and the cheapest on the first page (25 lenses) was still over 4000 euro. These probably will not be the lenses you start with, though. But if you really want to become a professional photographer: good luck, these are the prices you might get close to then.
In my opinion, this is where you would need to look at most, if you are serious about photography. Because if you want to get better photos, or specialized photos, then you will for sure buy new lenses. And you want to keep using those, even after you buy a newer camera. My personal advice would be: stick with the main brands on buying your (entry-level) camera. They have plenty of lenses available, they also have the more expensive high-end cameras that go with these lenses. And when it comes to the top brands, there seem to be only two for beginning photographers: Nikon and Canon.

There is of course much more to be said about lenses, and accessories - which I have not mentioned at all yet - but I will leave that for a future post. I do hope this post at least showed a glimpse of things you might consider when buying. However: besides thinking long, sometimes the easiest thing to do is: go to the shop, let the vendor explain things and take his advice. Also nice to know: there might be shops near you actually renting out cameras. You might want to do that, as it does allow you to get a real feel about the camera.


22 February 2017

Composition, the magic word

Composition? Are we musicians?

Being a non-native English speaker, I regularly look up words online. Google, Wikipedia and many others are awesome at giving you apparently answers on any question you can think of. And even some questions you would not think of. Like these below:
Which I found, using Google, on a site of the Daily Mail.

That aside, let's go back to composition. A word I also checked, before writing this post. In this case I arrived at Oxford Dictionary. If you did not click the link, the first definition says it is "The nature of something's ingredients or constituents; the way in which a whole or mixture is made up."
A photo is made up of light. Until we print it, then it's made up of paper (or whatever material we printed on) and ink.
The second definition makes things more interesting: "A creative work, especially a poem or piece of music." So yes, we are like musicians when we make photos. In case you think we're all like the ancient master composers Mozart, Bach, Viveldi and so: no, we're not. Some of us are like a six year old child playing Twinkle, twinkle, little star on a xylophone. Let me show you my skills: https://www.youtube.com/watch?v=8EFZq9lcM2U.

To be fair: I say both of the definitions are correct. Indeed a photo is composed of light, and light is one of the most important aspects of composition. There are many photos which are all about shadows and highlights. A photo is also composed of the elements visible on it. And there comes the music composer part. Because we can choose what should be on the photo and what we leave out. We can choose the angle from which we take that photo, the time of the day to have more or less light. So, yes, we are musicians. With a camera, instead of a musical instrument.

Show me the easy thing

There are many articles and books written about composition, there are plenty of rules to follow. But if you want the most simple one, it has to be this: fill the frame.
Take many photos from people going on vacation, shooting their family and friends on every location. And I guess many will look a bit like this one, that a friend of me took on a wedding. A bit distant, the subject in the middle of the frame. Lots of things around the subject.
I like the people on the photo, after all I was on their wedding (nope, not on that photo), but that only makes the photo worth something to me, it does not make it a good photo. I don't like to say it, but this is actually not a good photo. There is a lot of stuff on it that adds nothing, except distraction from the important part: the happy couple - and the back of the head of the girl blowing bubbles at them, which you don't see.
All that stuff above them and on the left of the photo could easily have been left out and the photo would still contain all relevant information. Here comes the easy thing then: if you fill the whole picture with just your subject, you do not have to think much about how the composition of the whole photo needs to be.


Then check the photo of the lion. There is simply nothing, except the lions head on the photo. This photo uses one of those "rules of composition": fill the frame. By zooming in until there was nothing else visible, I did not have to bother with further composition anymore. I did not have to think about whether something would make a photo better, or whether it would be a distraction.

There was no need for leading lines towards the subject. No need to make sure the subject was lighter and therefore attracted more attention. I will not say this photo is the best ever and it will probably never win any awards of awesomeness. But it does have a better composition than the first one, even if it is probably less "exciting".

If you make all your photos with the frame filled by the subject, you will have often a bit boring collection, though. Photos also can tell stories or bring over emotions. For such things, you will usually need context.
Compare again the two photos. The top one shows multiple people, it shows the candy bouquet of the bride. You might not guess it was a wedding, but you probably would conclude this is a festive happening. On the other hand, the second photo shows a sleeping lion. Where, how? No clue, the photo does not tell it. I can assure you the lion was very alive as I took this photo, but just from the photo, one might think it's a photo of a dead lion. Keep that in mind when you fill the frame with one subject, it generally excludes context.
I hear you mumbling: "Yeah, dude, so that is not even always useful, where was this great super easy composition tip?"
Hey, I did show you an easy way of composing, I did not say it is perfect, did I? We need to be fair, there are many books and articles written about composition, just because it is not that easy. Especially not as so many of these articles tell you that if you understand and mastered the part they talk about: "Now go and break the rule, so you get the more creative photo." And they all also tell you that it's good to follow the rules, but it is equally important to know when to break them. Helpful, isn't it?


Why is this crap in my shot?

There are pretty good explanations about why we have many things on our photos that we do not want to have there. And worse: we did not even notice them as we took the shot. As I am no psychologist, I won't go into the gory details, as that would be way over my head. But the reasoning about this is luckily easy to understand for a simple guy like me.
Think about walking on the plains. You look around you and can see far and wide. You notice everything, the trees on the left. The foliage in the distance on the right. The hill slightly behind that foliage. And there, near you, at the front are the beautiful purple flowers. You also see the four birds flying behind each other in the sky. We humans are awesome as we could see that in one glance, right? Unfortunately, not totally. Subconsciously we have changed where we looked, changed our focus. We saw multiple details and our brain is putting all that together to give you that image of the plains with everything on it. Were you sure there were four birds? You don't even think about moving your eyes, but they quickly go up and you focus on the birds in the sky. At that point you don't really see all the other things, even if you think to still "see" them.
The important part here is that we actually moved our eyes and focused on the birds as we thought about those, thereby excluding all other visuals for that moment. We do the same when taking photos. We see our subject and focus on it. Excluding all that goes on around the subject. Until we later examine the photo and see those nasty tree branches coming in from the side.
How do you keep that stuff out of your photo? By looking. In this case do not just look at the subject, but look at the sides of the frame through your viewfinder, or on the screen of the camera. Shift your attention to those sides and you can notice these branches. I'll be honest and tell you it's easily written, not as easily mastered. I am well aware of this principle and every time I tell myself I will pay better attention. Still I usually end up cropping photos or remove things with Photoshop, as I simply did not pay enough attention. You can see an example (unedited RAW, so not very pretty) above. I wanted to make a photo of that old kitchen. I thought it might be nice with that window and the kitchen sink on it too. So, I made sure I took the shot at an angle I thought would be well. Now look at the side of the frame. Do you think I noticed that arm as I took the photo? Of course not. I was busy looking at the kitchen stove. At home, looking through my photos I noticed that annoying arm almost immediately, though. Cropping this out is not hard to do, but paying attention would have made me put a step forward and that arm would be gone.
Now the good news: the experienced photographers claim that if you keep trying it will at a certain point become an automatism. I guess I so far have not tried enough. :)

Okay, we're almost done. The good part is: you have managed to come to the end of another post and still can live to tell it! The less good part is: we have not really gotten far with our magic word, so I promise I will come back to composition. There is still a lot to say about that and fill the frame is definitely not the only tool of composition. Even if I am pretty sure it is the easiest one.

19 February 2017

Raw food? Or pre-cooked?

What is this fuss?

As I was just starting with my camera I was naturally looking a bit around on the Internet. And there I found those awesome instructions. You know the kind of instructions from people who claim to know it all. It was obvious: a real photographer only shoots RAW. Obediently I made sure my camera did that too and started clicking. The first results were underwhelming, my shiny new camera made rather dull photos. Especially when I had the opportunity to compare my photos with those made by my sister, using a borrowed Canon EOS 450D. Hers were way better than mine! Little did I know that she shot JPG and I shot RAW. Nor did she by the way.

So the fuss is about the difference between RAW and JPG. Which both are image formats. The cool thing is, you can save both and you can view both. Both will show your photo. That should already make people wonder: "What is this all about? My photo is there, do I need to do anything?"
And as usual: the answer is not a simple yes or no, that would be too easy. So, we know that the answer is: it depends and that leads us to the question: "So, what does that depend on then?"
Let's first say that not every photographer will have that choice. Cell phones and point and click cameras tend to always use JPG.
DSLR's and the newer compact camera's usually offer a choice. One of these choices  is usually "RAW + JPG", meaning the camera will save each photo twice. Once in RAW and once in JPG. That's convenient, we don't need to think we can take both. Ha, life is easy. Or not, as shooting in both formats means we will use more space on the memory card. If you're low on that, you surely do not want to do both. That leaves either JPG or RAW.

Let's see this RAW stuff!

For that we first would need to see what is the difference between them. They are both ways to save photos and they both show the image you shot. But if you would make the same photo twice, once in JPG and once in RAW, then you would see a big difference. Let's start with a RAW image.
RAW image, straight from camera

This photo was made in a museum I visited. I thought that looked like a nice passage and found the big plates making a nice contrast to the wall. And then you do what all noobs do: you point your camera and click. The result is... well... not totally what I would have wanted.
As you can see the image feels flat, there seems to be almost no depth. The colors are bit dull. And, being a noob, I of course did not even have the camera straight, so it's at an odd angle. That latter part has nothing to do with the RAW format, just with not taking the time to make a proper photo.
Strangely enough, while this photo looks not that great, RAW actually has better "quality" than JPG. The main reason is the amount of brightness levels. To make a little detour, let's look at what a bit is. It's a "BInary digiT" and can be one of two values. These are usually represented by 0 or 1. Or you could call them on and off. And some call it true or false. If you would have 1 bit, you could have 2 levels of brightness. You would be able to have real B&W photos, with each pixel on the image being either white or  black. No shades of gray, no color, just pure black and pure white. If you would have 2 bits, you would have 4 possibilities. Written in binary they would be: 00, 01, 10 and 11. And with three bits that would double again to 8. They would be: 000, 001, 010, 011, 100, 101, 110 and 111.
By now it's probably clear that using four bits would give 16 possibilities. I am too lazy to write them out, but it will go to 8 bits per channel (either red, green or blue) for JPG. Which means we can have 256 possible levels of brightness for each color.
RAW format uses 12 or 14 bits. And that gives us a whooping 4096 or 16384 possible levels of brightness! As we're busy with photography, we'll quickly leave all this binary stuff and just keep in mind that RAW can have more possible values and can therefore record more accurate information about the color. So, if your camera supports this you would always shoot in RAW. Right?
Wrong, as JPG has advantages too!

Show that JPG too then!

We know JPG has less detailed information, as it uses less bits. The direct advantage of that is: less usage of your memory card as the file simply is smaller. It's actually not only smaller because each pixel uses less bits, but JPG also compresses the file, saving even more space. JPG is so awesome at compression, that it would be much smaller than, for example a TIFF file. However, that awesomeness has a price, as JPG uses what is called a lossy compression. When it compresses a file it actually is also looking for spots that have such minor differences that leaving that difference out is hardly visible. And that is then exactly what it does. It leaves the information out and there is no way of ever getting that back. That's considered a bad thing and every time you save an image in JPG, for example after editing, more information will be lost. So, please, do not go on editing, saving, editing more, saving. Edit once, save once.
How a JPG image could look
Anyway, let's go back to the advantages of JPG. Here you can see almost the same photo as the one above. This one was edited from RAW, so probably not exactly how the JPG would look. No, rephrase that: certainly not what the JPG would look. Which can be noticed immediately: this image is straight and not at an angle! That was indeed the first thing I did in editing. I also cropped it, but those actions have nothing to do with RAW and JPG. You can do that in both formats.
What is clearly visible is that this image seems to have more depth, the colors are more vibrant and those plates contrast more with the wall.
Although I made these corrections manually, the camera will do that for you if you shoot JPG. It will add contrast, make it more vibrant and sharpen your photo. In short: your photo will look much better out of the camera.
By the way, if you like the top image better than you do this bottom image, than I probably did a very poor job on editing. But should you feel like that, let me know and please tell me why, so I might improve my editing skills. And I will hand out kudos to the person who can tell what I all did during my edit.
Oh, did I mention we are elitist enough to not call this editing? We call this post processing. Or we say: "we can do that in post." So there you have a nice tip to at least sound professional. 😊

Okay, I got that. When to use what?

Let me start with a simple thing: if you're happy as it is right now, simply keep doing that. There are a few things you could consider.
If storage space becomes an issue, you're more or less forced to JPG.
If you do not feel like editing (sorry, post processing) your images, then also use JPG.
Should you want to send the images quickly on: use JPG. Or, if you want to show them quickly and later still work on them: use RAW + JPG.
If you want the most control over how your image will look, you would be better of shooting RAW. Just as you would use RAW to have the most information in the photo.

If we go back to the intro, where I said I had read all professionals shoot RAW, can we then say this is actually true? If you think so, you're wrong. Yes, professionals will usually use RAW. They tend to edit their photos anyway and shooting in RAW gives the best start for that. But now imagine that you're a photographer at the event of the year. For Americans I would say the Superbowl. For us mere Europeans we can take the finals of the World Championship Football (or for Americans: soccer).
You are there, and so are a hundred other photographers, all working for newspapers that need to print soon. With your photos. I hope you did bring your laptop to the stadium, so you can quickly edit the photo you just shot. Just as you are doing that, one of the teams scores. The decisive one! Yeah, you missed it, as you were editing.
Being a pro, you will certainly not let that happen. So you do not edit your photo, but send them over quickly. Shot in JPG. Goes also much faster over the wireless connection you and the other hundred photographers are sharing, as it is much smaller. And that would mean a score for you: your photo, page one on the newspaper.
Okay, for me unlikely but they say a girl can dream. And I add to that: a guy can dream too.

17 February 2017

Why photography

Going on vacation

Before talking about all things I experienced or hope to experience, I suppose it cannot hurt to at least explain where it started. And that is because of a combination of two vacations. One to Uganda, which I did in 2016. And one to Kenia, quite some years ago. Not that I never went on vacation in between, but - coming from the Netherlands - for both countries the wildlife and landscape are amazing and special.I really loved the trip to Kenia and I was lucky enough to have a professional photographer from Belgium in the group. He carried a big backpack of equipment around all day. And at the end we got a video tape he had made.
I can tell you, that was much better than the photos I had made. What stood out the most with those photos was zoom. My camera at that time had little zoom and most photos turned out like: "There in the distance, that small spot. That's a lion."
So as I planned my vacation to Uganda I knew I wanted a nice camera. I had a point and click camera which, I thought, made fine photos. But I wanted something better and got an entry level DSLR. In my case a Nikon D3200, it came with two kit lenses and I especially for the vacation also bought a Sigma 150 - 600 mm lens.

Now they say that a good photographer can make awesome picture with a cheap point and click camera, and that gear is not decisive, but for a nobody gear helps a shit load. The quality of my photos went sky high, compared to my previous photos. And given the quality difference I doubt you can get those awesome photos with a cheap camera. You might make interesting ones, but they will not be as good as the photos you can make with the better camera. This doesn't mean that I believe gear determines everything, but I do believe that to make quality photos, you need at least a good camera. Doesn't need to be the best, but can't be a poor one either.

Hippo's can stare back at tourists. Specifically those in Uganda.
Anyway, I had bought this camera a little while before my vacation, so went out a few times to make photos and then took it along to Uganda. My first wish would be that I had had it earlier and actually tried to learn what all these settings were. The amount of wasted photos is enormous. Luckily still plenty reasonable photos left to have as a memory. But the amount that were overexposed, or underexposed, or ruined by high ISO or had motion blur due to too slow shutter speed is way too high.

In short: I was happy shooting photos and found it interesting enough to keep on making photos. Yet, for all other noobs out there like myself: learn a little bit about your camera before going to use it on your vacation. Really do. This is the most awesome tip I will ever give you. :)
Make sure you do not go out there without being able to change for example your ISO setting. Oh, and should you shoot in RAW, don't be disappointed about the look of your photos, compared to those of someone else shooting JPG. Yes, yours will look rather bland at first. And I will use this awesome blog thingy to even explain why. But that's for next time. For now you can thank my vacation, as that is the reason I started photography and later started this blog. Or curse my vacation as it means you now wasted some minutes of your life reading this stuff.

Don't forget: best learning is done by practicing, so if you are a beginner: go out and make photos. Above all though: make sure you have fun doing that!

13 February 2017

The one triangle to rule them all

The exposure triangle

There is no blog about photography that can escape this one. Like Sauron in the Lord of the Rings books  had his one ring to rule them all, photographers are stuck with one triangle to rule them all. No matter how well equipped you are, no matter how much you studied, no matter whether you're a professional or just clicking away, this triangle will determine how your photos will look.
And what is it about? Light. More light or less light. And as we do not want black photos, nor white photos, we need to come up with something that sits in between there and in a way resembles the amount of light we had when shooting the photo.

Where is that triangle?

It's everywhere! You cannot avoid it, every photo you make is faced with that triangle. However with the simple camera's or with smart phones you are not exposed to the exposure triangle. The camera will determine the settings based on what it determines to be the best. If you buy a more advanced camera, it will have knobs and buttons and you are supposed to make sense of these settings. The good news: these camera's also come with an "auto" mode. And the camera will in most modes (partially) control what is needed.
But most people did not buy such a camera to only shoot in auto mode. So, off you go to websites or books to learn about the three settings. These are called shutter speed, aperture and ISO. If you want some good explanations, just google exposure triangle and click on links. It is explained many times. And just to add yet another explanation, I'll add mine here too.

What is it all about?

The above mentioned settings have different influences on how the photo looks, but they all have one thing in common. They influence the amount of light that reaches the sensor in the camera. So we need to tweak these settings so that we have the correct amount of light, and the secondary effects of these settings to give us the photo we want. And that means that changing one setting, will raise or lower the amount of light on the photo and to offset that, we might need to reduce one or both of the other settings.

Shutter speed

The first setting is shutter speed. And it determines exactly the... *drum roll* ... shutter speed! It opens the shutter for an amount of time, allowing light to reach the sensor. And then it closes the shutter. The longer the shutter is open, the more light. Can't get any simpler than that.
I hear you say: "But wait, what is that other influence this setting has then?"
Movement. If things in front of the camera move while the shutter is open, that will cause a blurred effect on the photo. So to keep everything sharp, you want a fast shutter speed. And that in return means: less light. Of course it is a bit depending on what you want to shoot. The racing car just whooshing along will surely need a much higher shutter speed to be seen as sharp than... oh well, the magnificent pebble laying on the path in your garden. Given the speed that the pebble moves, one can see that a shutter speed of hours would still leave it pretty sharp on the photo.

Aperture

The second setting is called aperture. It determines how wide the opening in the lens is. Obviously the wider the opening, the more light can enter. Now you start thinking: so I take a photo of that racing car mentioned earlier. And you know that to keep that sharp, you will need a fast shutter speed. Easy: just have a wide aperture. problem solved, we can go home. Right?
Not yet. This setting has also a secondary effect. Your super wide aperture that got the racing car super sharp, managed to get the tip of the car sharp. The rest is... well... blurred. Hey, you shoot: I had the fast shutter speed. Where is that blur coming from?
From your aperture. The secondary effect of aperture is called depth of field and basically tells the camera: I want only a small depth to be in focus, so blur the rest. Isn't this great? To get the whole car in focus and not blurred, we cannot use the widest aperture. We need to narrow the aperture. And thus we get less light on our sensor. Which brings us to our last setting...

ISO

ISO is the International Organization for Standardization and apparently that organization is housed in your camera. Or they have remotes and do complicated things from their offices to access your camera and influence your photos.
Okay, I admit: I never saw them in my camera, nor using remotes. So, the people working at that organization most likely do nothing. But they did define a standard about the sensitivity ratings for camera sensors. Quite useful actually, because we now can talk together and know we are talking about the same. Otherwise I am sure each manufacturer would have different ratings there. I guess by now you're stamping your feet and want to shout at me to tell you what it does. Or not, but if you did not: I will tell you anyway.
This setting determines, which you guessed already of course, the sensitivity of the sensor. The higher the setting, the more sensitive the sensor is. Making it work with less light. And that should solve our racing car problem. We just turn that setting fully upwards and then take the shot.
Isn't that beautiful? We have the motion frozen thanks to our high shutter speed, we see the full car without blur, thanks to our low aperture and thanks to our high ISO settings we see... what are those specks all over the photo?! Where did that come from?
Yes, you just found out the secondary influence of the ISO settings. The specks are usually called grain. And the higher the ISO setting, the more you get of it. Which is why in general the ISO setting is kept as low as possible.

How to make the perfect shot?

I am going to tell you the secret now. You don't. If there was not enough light to keep the settings so you could have fast shutter speed, wide aperture and low ISO, you will need to sacrifice. And here comes your choice. I mean: do we really need to see the whole car and boarding along the road sharp? Perhaps we want to see the driver very sharp, the car a bit less sharp and the boards full of advertisement? Well, the boards do not need to be sharp at all. So, you can pick a bit wider aperture easily. And so you can make your choices. Perhaps you think a bit darker photo might be just the look you want.

As you see: you are bound by the triangle, but within it you are free to move as you want. You can pick how you want to have your photo look. And that is why not shooting in auto mode can be a good thing. Yes, in many cases the camera will pick good settings. But the camera does not determine what you want to show. It picks according to its internal programming.
You might not be forced to sacrifice, sometimes you choose to do that: you might want that smooth look from a waterfall that requires a longer shutter speed. The camera will never do that. You have that choice. And while you cannot escape the triangle that rules them all, you might well be able to make the triangle work for you to show your skill as a photographer. And should people tell you how great your skill is: tell me how you got there, so I might one day call myself skillful too. 😜

12 February 2017

Start of a blog

Why a blog?

The short counter of this would be: why not a blog?
Ah, I hear you say: "There are so many, what makes this one different?"
My answer would be to tell you there is no difference. That it will not be better than any other blog. Perhaps even worse. There is of course a major difference for me: this is my blog. And that makes it special to me. Even if alone for the fact that I will be doing the work of writing this time, instead of only reading.

The above did not answer the question in the heading.
To be honest, I am not sure why. I like writing. Not that I am great at it, and especially not in a foreign language like English. But I do like it. Perhaps it is the creative process involved in it that attracts me, just as in photography. And, just like photography, you can be mediocre and still do it.
It's probably part an eagerness of sharing my opinions. It's part the wish to tell about photography. Not in the way an expert would, but in the way as I experience it. Many blogs are written by people knowing very well what they are doing and what they are talking about. Mine will most likely never turn out that way. Just for the reason that I do not aspire to become a professional photographer. I have a job and like to make photos in my spare time. I like post processing them even more. But I like it as a hobby. To relax, to spend a nice time. And to not have to feel bad should I do nothing with it for a while.

What to expect?

That is a question I cannot answer fully right now. I can tell you what I think currently, but with passing time, things change, people change and so do blogs change. My intention is to keep this mostly about photography.
That means photography in general, but for a big part it will be about how I experience this. So, it will also be a bit about me (no worries, I will leave all the NSFW stuff out 😀). I will most likely point to things I found on the net, or post a photo. The photos I might post will be mine, or I will be as certain as I can be that I am allowed to post them. I then might give my opinion about a photo or site. I might tell about what I thought or was doing when I took a photo. Or perhaps I might just tell how I changed it in post processing and why. Or how I did it.


How often will there be content?

That one is more easy to answer. That is - in the end - depending on readers and feedback. If I find that after a while still nobody was interested in reading the blog even once, then I am probably going to stop. If I find there might be people taking the time to read it, I will most likely go on and keep posting. However I do expect not more than once a week. Could be a little above that in the start, and could be a little less often later on. As at this point I have some ideas about what I might blog about, but  if those are written, I would have to find new topics.
But, if I find people not only willing to read, but perhaps some that actually would want to contribute, there might be a bit more.

Now, I probably should not waste more of your time and leave you as reader to pursue other interests. Especially as I think this should suffice for the introduction of this blog, giving you a rough impression what it will be about.